

Installing a pool heat pump is a fantastic way to extend your swimming season and enjoy warm, inviting water whenever you like. With this guide, we’ll take you through the process, from choosing the perfect location to connecting the plumbing so you can save on installation costs.
Disclaimer
Before starting, be sure to check your state’s “Pool Safety Fencing Rules & Regulations” to ensure compliance with legal standards. This guide offers general advice; always consult the manufacturer’s instructions for your specific heat pump model. Professional installation ensures optimal performance and avoids voiding your warranty.
DIY or Professional Installation?
Installing a pool heat pump is a manageable task for handy DIY enthusiasts. The majority of the work is cutting and glueing 40mm plastic piping. However, if plumbing or setting up bypass systems isn’t your forte, consider hiring a professional pool technician or plumber.
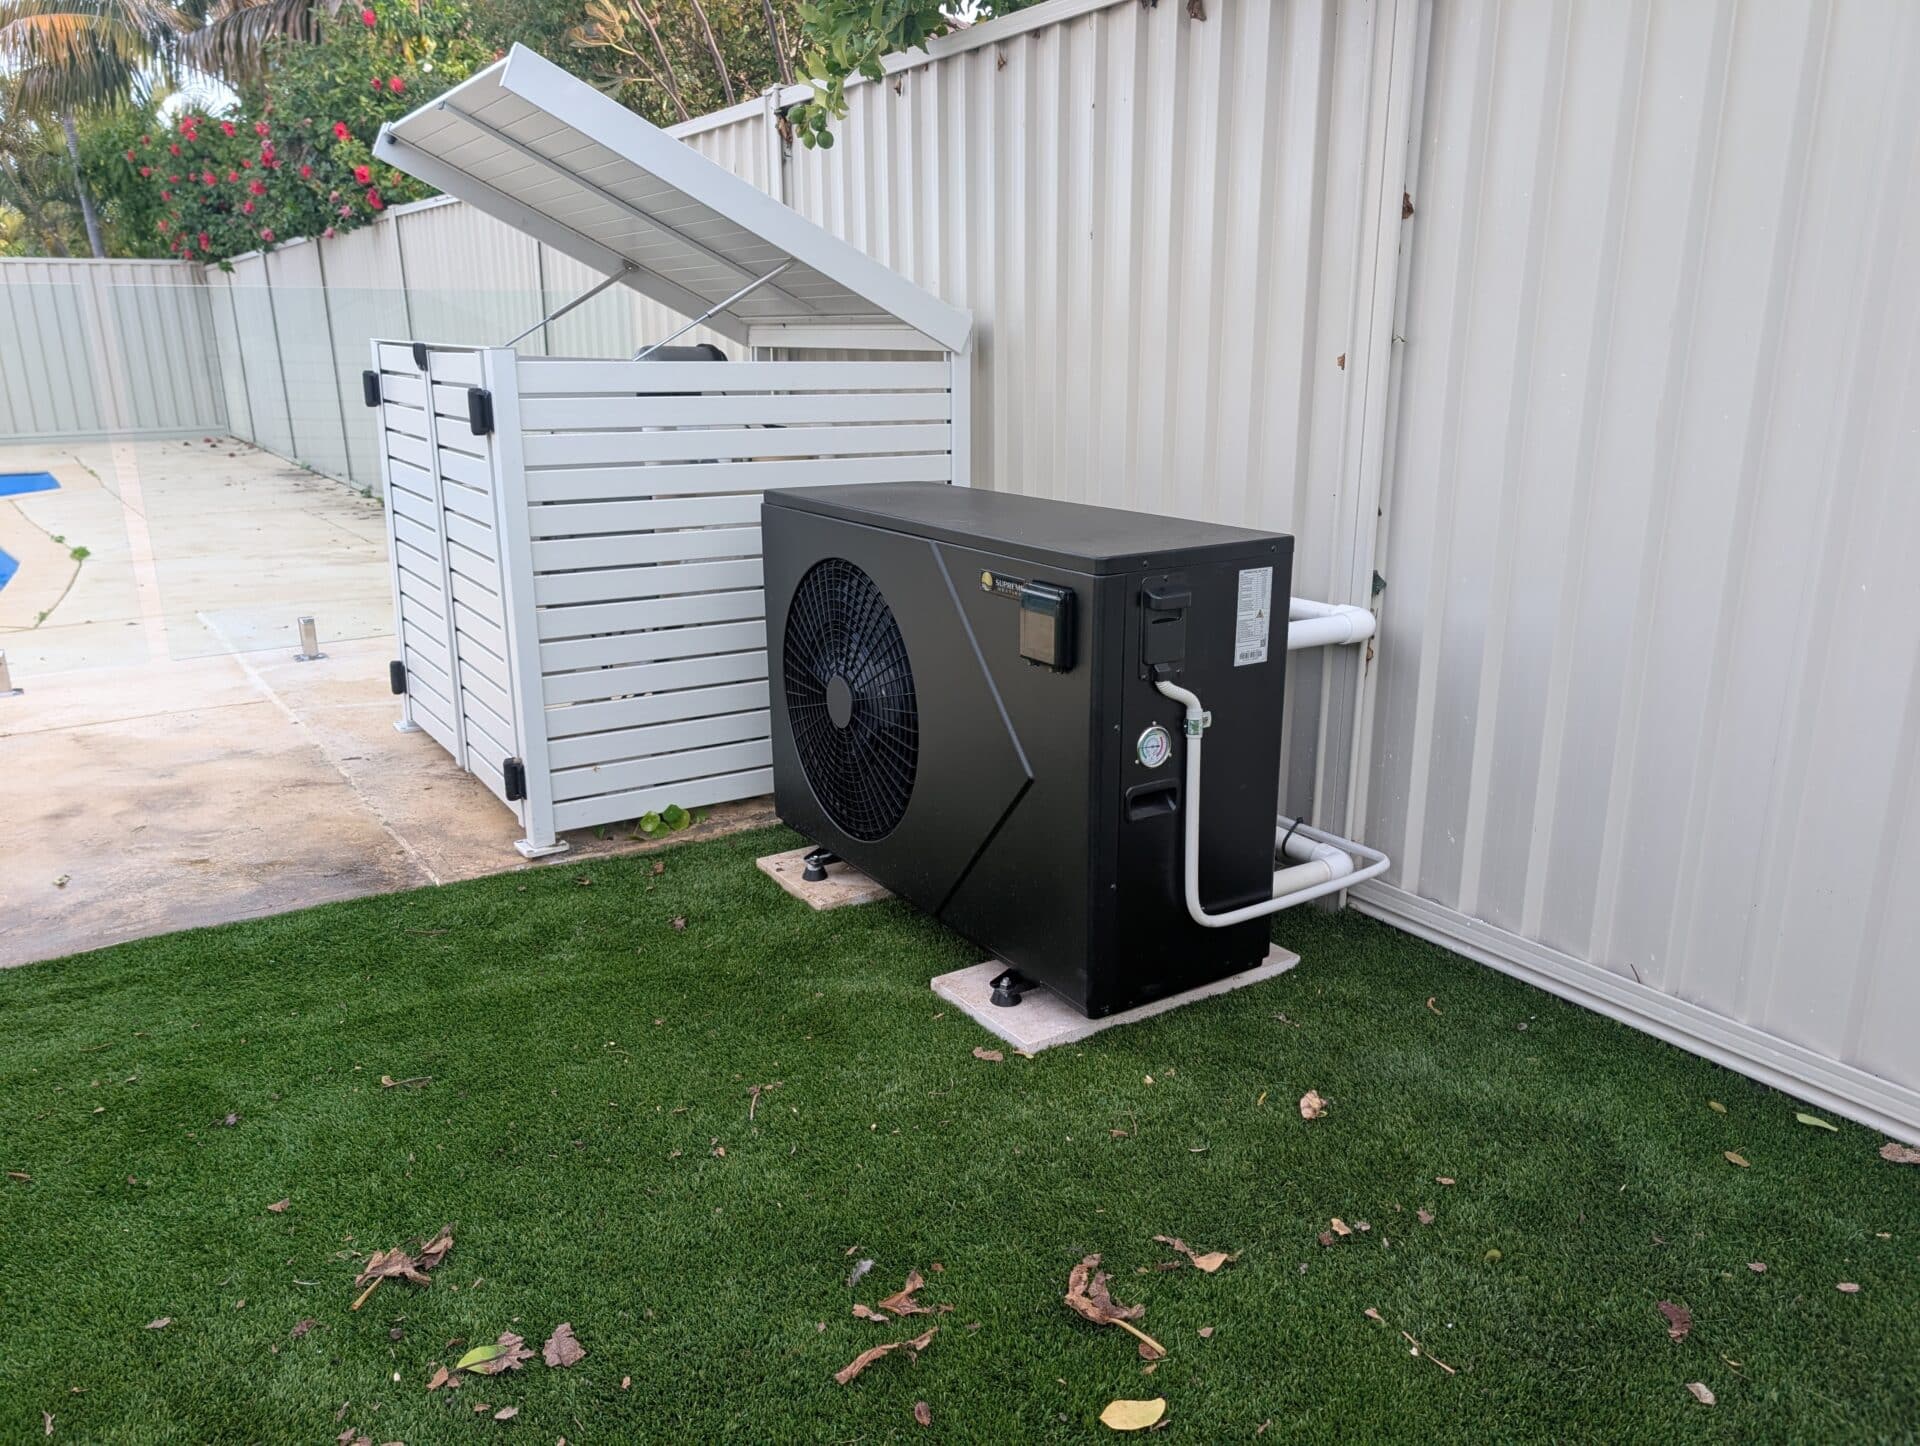
Choosing the Right Location
Where you place your heat pump has a significant impact on its efficiency and lifespan. The heater needs to be able to breathe, and disperse air efficiently, so ventilation is key (see Clearance Requirements below). You should never box a heat pump into an enclosure.
For electrical connections, ensure the heat pump’s location is close enough to a power source, or plan for appropriate cable lengths. For detailed electrical requirements, see our guide on electrical.
Although heat pumps are waterproof, aim to place the heater at least 1.5 metres from the edge of the pool to avoid excessive splashing. Also be mindful of areas where debris could be an issue, such as underneath overhanging trees (especially for top-discharge heaters).
If using the filtration method to install your heater, position the heat pump close to your pool’s pump and filter to maintain efficient water flow. If the distance is significant, you might need larger pipes or a more powerful pool pump.
Finally, be mindful of pool fencing and ensure the heater is at least one metre away, otherwise it may be classified as a climbing hazard which could break pool regulations in your state.
Clearance Requirements
Pool heat pumps need adequate clearance for airflow. This varies by heater, so always check the brochure or manual for the necessary clearance. In general, front discharge models require the following:
- Front: 1.5 metres
- Sides: 500mm
- Rear: 700mm
However, if you are confined to a smaller space, such as down the side of the house, you may need to opt for a side-discharge model such as the Sensaheat PiX or the Madimack V4, which expel air sideways. The clearances may vary by heater size (so check first), but most models require:
- Front: 150mm
- Sides: 300mm
- Rear: 500mm
- Top: 1.5 metres
Always refer to your model’s guidelines and pick an open area where the unit can draw in fresh air and expel cold air freely.
Preparing the Installation Surface
A pool heat pump works best on a solid, level base. If the unit is tilted, it can vibrate more than normal and put extra stress on the compressor and fan, leading to unnecessary wear and extra noise.
Levelling the Area
- Clear and level the ground with a spirit level.
- If applicable, wet the soil and let it settle before final adjustments.
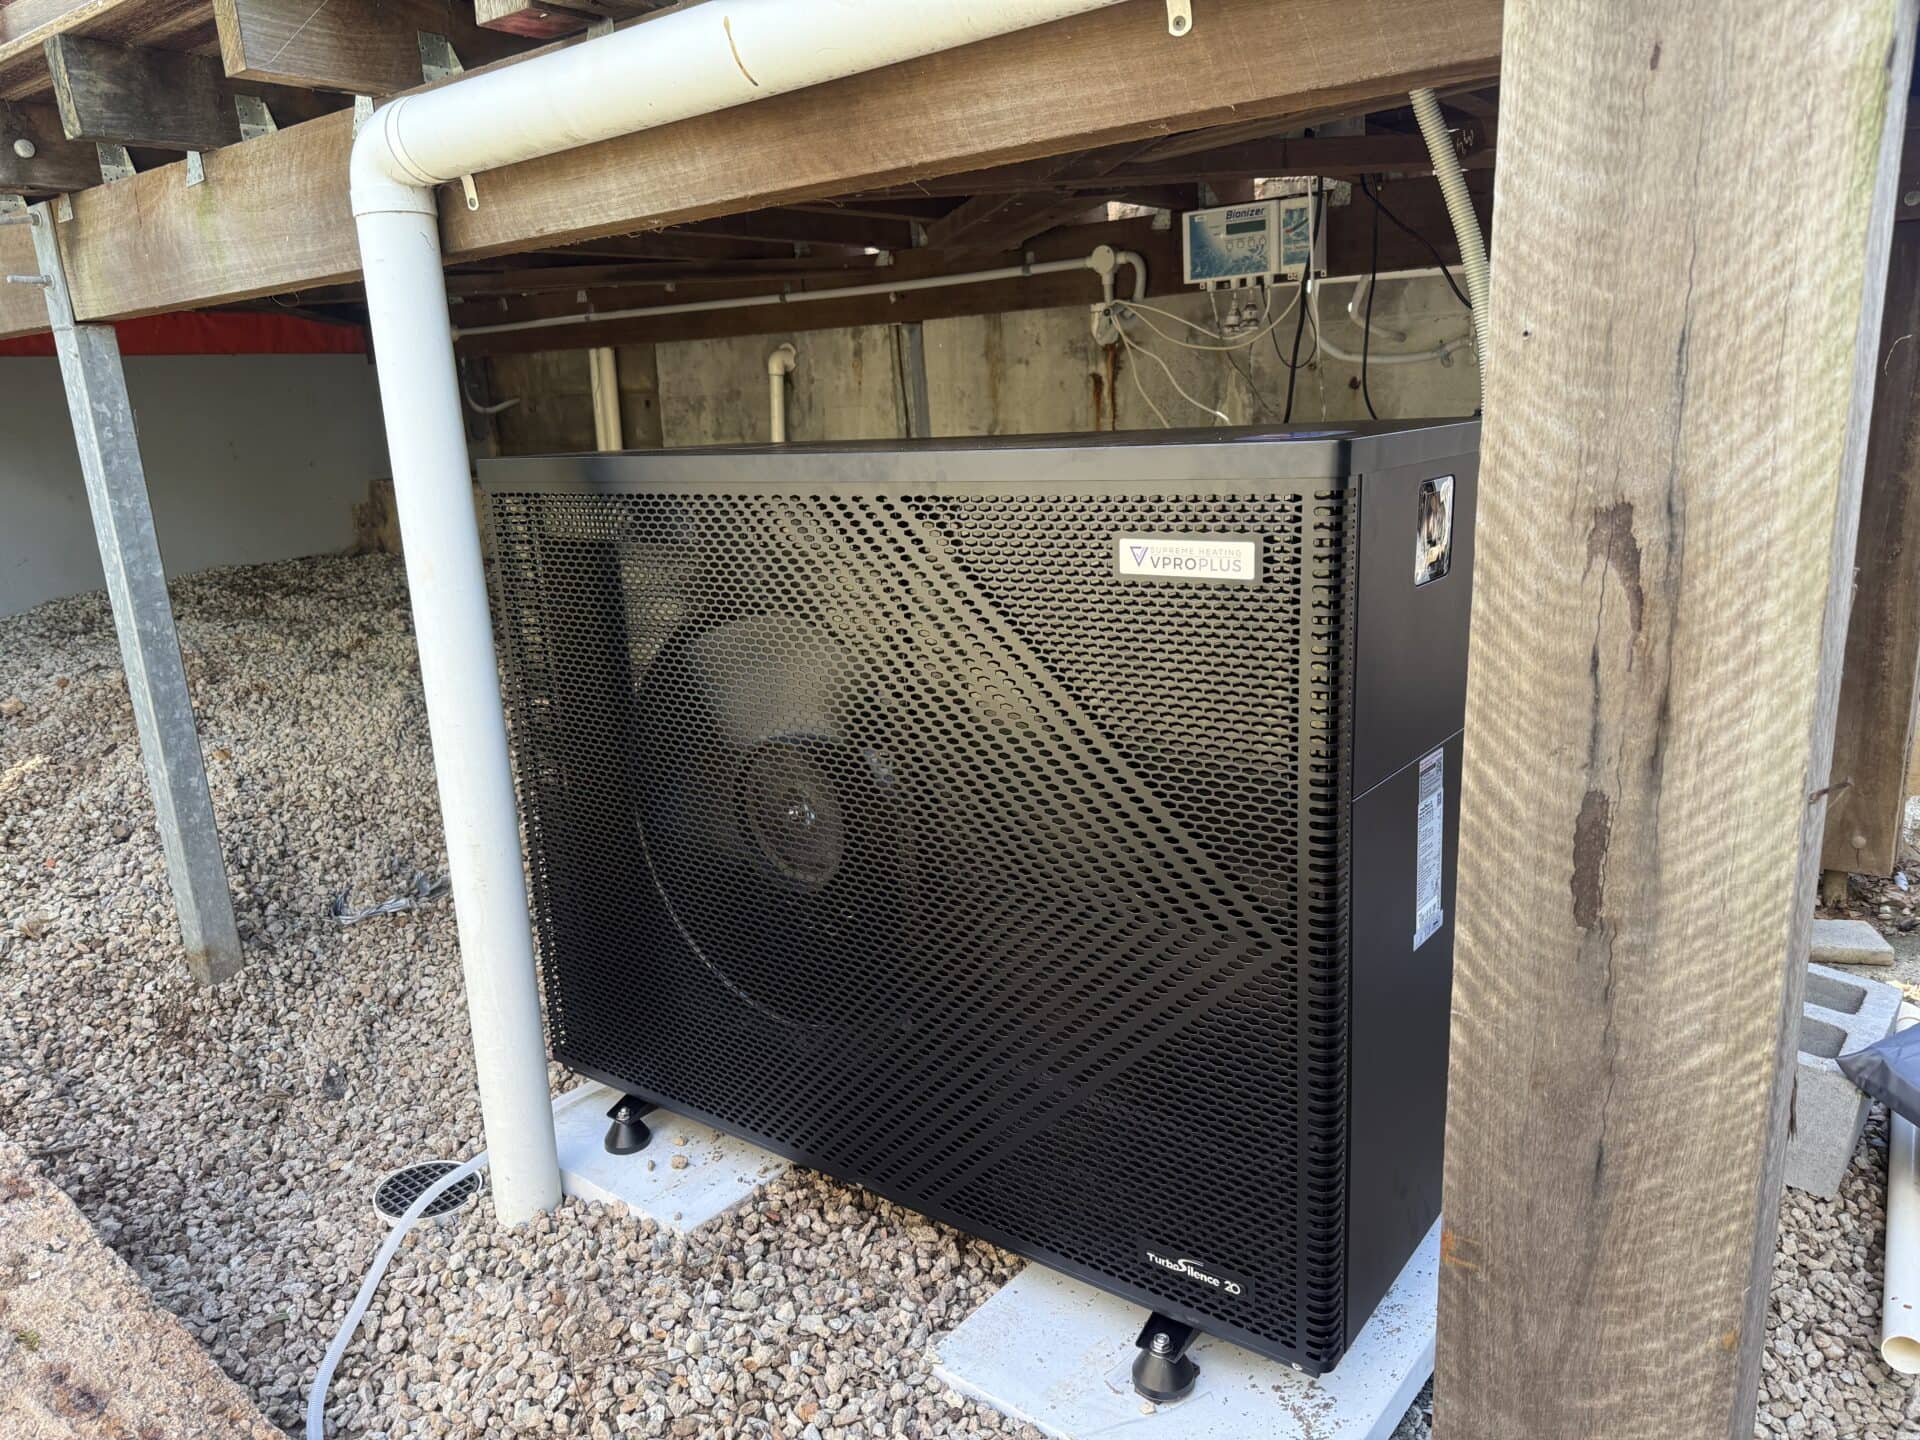
Creating a Stable Base
- Use concrete pavers or a 100mm-thick concrete slab with gravel underneath.
- For wooden decks, ensure proper clearance and consider adding rubber pads to reduce noise and vibration.
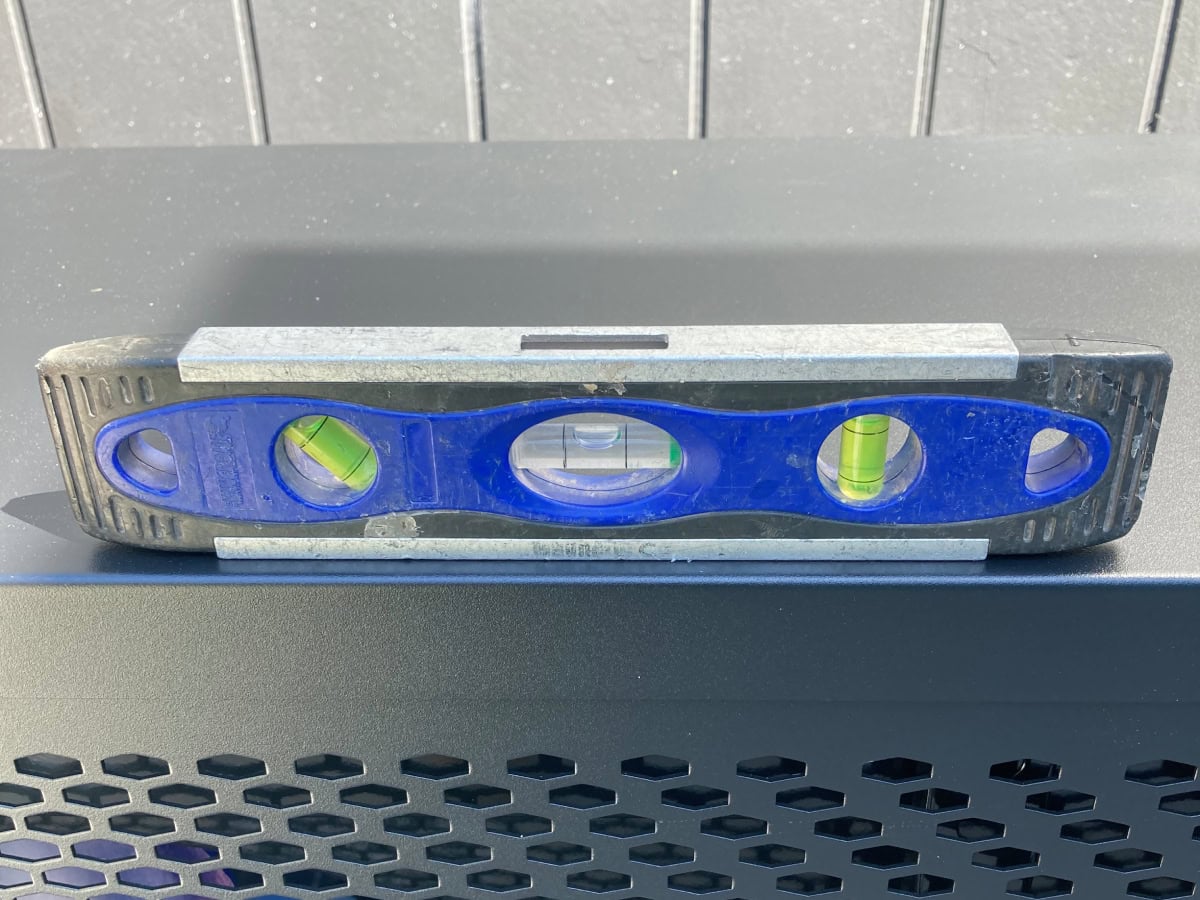
Adding and Levelling the Heater
Once the base is ready, carefully place the heat pump in position. Use a spirit level across the top of the unit to make sure it sits flat in all directions. Take your time with this step — even a slight tilt can lead to extra vibration and uneven drainage from condensation.
If the heater isn’t perfectly level, adjust the base by adding or removing a little gravel or using thin rubber shims under the feet until it’s spot on.
Connecting the Plumbing
Getting the plumbing right is just as important as choosing the right heat pump. A well-planned setup ensures the heater runs efficiently, reduces wear on the pump, and makes future maintenance simple.
Installing a Bypass System
A bypass system is simply a way to control how much water flows through the heater, or to divert water around it if servicing is ever needed.
This usually involves two valves. One to adjust the amount of water flowing into the heater, and otherwise diverting water into the bypass line, plus a non-return valve to ensure water can only travel back to the pool. This installation method also makes it easy to isolate the heater if it needs to be removed or disconnected for repairs.
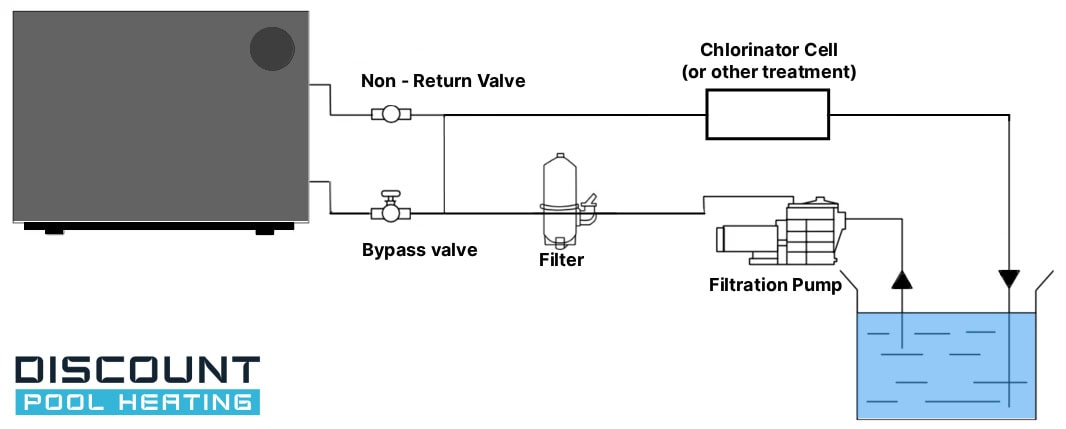
Filtration Method Pool Heat Pump Installation Diagram
This is the most common setup for residential pools. The heat pump is installed after the filter so only clean water passes through, and before the chlorinator or chemical feeder to avoid chemical damage. If your pool runs on a standard filtration pump and timer, this is the layout to follow.
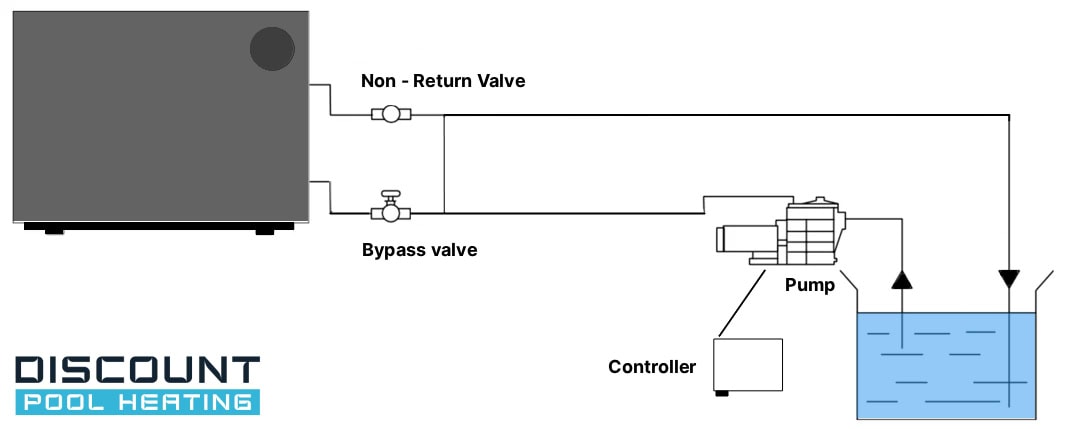
Solar Provision Pool Heat Pump Installation Diagram
Using the solar provisions setup allows you to position the heat pump away from the filtration equipment. The heater runs off a dedicated pump and controller, ideal if space is tight near the filter or if you’d prefer the heat pump in a different part of the yard.
Flushing and Leak Testing
Before powering up the heater, run your pool pump with the bypass open and water flowing through the system. Check each connection carefully for drips or leaks. Tighten fittings if needed. Once you’re confident the plumbing is watertight, adjust the valves to allow water through the heater and confirm a steady flow.
First Start-Up
With the water flowing correctly, switch on the heat pump. Set your desired temperature and let the unit run for at least a few minutes. Watch the display for any warnings or error codes, and listen for unusual vibrations or noise. Re-check the plumbing joints once more to be sure nothing has loosened.
Adjusting the Water Flow Rate
The water flow rate through the heat pump is critical for efficient heating. You can use the bypass valves to fine-tune this. Aim for a 2°C temperature difference between the water entering and leaving the heat pump. Both temperatures should be displayed on the screen.
If there isn’t enough water going through the heater, it will likely show you an error code, typically an “E3” or “Error 3”. Simply open the valve a bit more until the water flow is adequate and you reach the 2°C differential.
Managing Condensation
It’s normal for heat pumps to produce condensation while running — sometimes several litres an hour in humid conditions. Make sure this water can drain away freely. If the heater has a drainage spout, connect a small pipe to direct the water away from the base or any pathways.
Electrical
Always ensure electrical work is carried out by a licenced electrician.
Ready to heat your pool?
With your heat pump installed, plumbed, and tested, you’re set to enjoy warmer water and a longer swimming season. The next step is bringing your pool up to temperature and learning how to get the most out of your heater day-to-day.
Take a look at our Getting Started with Your Heat Pump Guide for step-by-step tips on heating your pool for the first time, setting the right temperature, and keeping your system running at temperature.
If you’d like advice on choosing the right heat pump, get in touch with our team — we’re here to make sure you get the best result.
References
https://www.fairland.com.cn/allnews/where-to-place-my-pool-heat-pump.html